Starting a fire is an essential skill for outdoor enthusiasts, campers, and anyone who wants to be prepared for emergencies. Knowing how to start a fire can provide warmth, light, and a means to cook food or purify water. This article will provide a comprehensive guide on how to start a fire, covering the necessary materials, safety precautions, and step-by-step instructions.
Table of Contents
- Materials Needed
- Safety Precautions
- Step-by-Step Instructions
- Conclusion
- FAQ
- What’s the best way to store tinder to keep it dry?
- How can I start a fire in wet conditions?
- What are the signs that wood is properly seasoned for use as fuel?
- How do I adjust my fire-building technique for different weather conditions?
- What size should my fire pit be for optimal safety and efficiency?
- How can I minimize smoke production from my campfire?
- What are the most effective fire-starting methods for different elevations?
- How should I modify my fire-building approach during different seasons?
- How can I tell if my campfire isn’t burning right?
- How can I estimate the amount of firewood needed for different durations?
- What techniques help maintain a cooking fire at consistent temperatures?
- How do I properly prepare wood in emergency situations when everything is wet?
- What are the most reliable natural tinder materials for different environments?
- How can I maintain a fire during sleep without compromising safety?
Materials Needed
Tinder
Tinder is the first material to catch a spark and ignite the fire. Examples of tinder include dry grass, leaves, bark shavings, or fine twigs. When selecting tinder, ensure that it is completely dry and easily flammable.
Kindling
Kindling consists of small sticks and twigs, slightly larger than tinder. Kindling helps transfer the flame from the tinder to the larger fuel logs. Choose kindling that is dry and snaps easily when bent.
Fuel logs
Fuel logs are larger logs or branches that will sustain the fire once it is established. Select fuel logs that are dry and have been seasoned for at least six months to ensure optimal burning.
Lighter or matches (optional)
A reliable source of ignition, such as a lighter or matches, can be helpful, although not always necessary. Consider using eco-friendly fire starting solutions to minimize your environmental impact.
https://www.youtube.com/watch?v=LzXx2r39s2Q
Other tools (optional)
Other tools that can be useful when starting a fire include a knife, axe, shovel, protective gloves, and glasses. These tools can help you prepare the materials and maintain safety throughout the process.
Safety Precautions
Choose a safe location
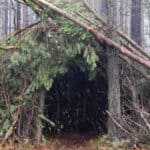
Select an open area away from flammable objects like fences, sheds, and trees. If snow is present, build the fire on a platform of green logs or rocks. In dry conditions, clear a patch of bare dirt to avoid starting a grass or forest fire.
Prepare the area
Tie up long hair and wear protective gear, such as gloves and glasses. Keep a bucket of water nearby and remove extremely flammable items from the vicinity. This will help prevent accidents and ensure you can quickly extinguish the fire if necessary.
Exercise caution
Never leave the fire unattended and keep children and pets away. Avoid burning plastics or throwing fireworks into the fire, as they can release harmful chemicals or cause injuries. Always follow campfire cooking safety do’s and don’ts to ensure a safe and enjoyable experience.

Step-by-Step Instructions
1. Gather materials
Collect tinder, kindling, and fuel logs before starting the fire. Ensure you have more fuel than you think you’ll need, as you may require more than estimated. Having all materials ready will make the fire-starting process more efficient.
2. Create a fire pit (optional)
If a man-made fire pit is available, use it. Alternatively, create a circular space using large rocks to contain the fire and provide insulation. This will help prevent the fire from spreading and make it easier to control.
3. Build the base
Place the tinder loosely as a base in the center of the fire pit. Arrange kindling, such as small sticks and twigs, around the tinder to form a tepee or pyramid shape. This structure allows for proper airflow and helps the fire grow gradually.
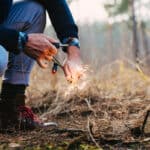
4. Light the fire
Use a lighter or matches to ignite the tinder in the middle of the base. If there is a breeze, light the tinder on the upwind side so the flame is blown toward the kindling. Be patient and allow the tinder to catch fire before adding more fuel.
5. Add fuel gradually
As the kindling ignites and the flames grow, slowly add larger sticks and fuel logs to the fire. Continue adding fuel as needed to maintain the desired size and intensity of the fire. Remember to master campfire grill techniques to make the most of your fire for cooking and warmth.
Conclusion
Starting a fire is a valuable skill that requires knowledge, preparation, and caution. By understanding the necessary materials, following safety precautions, and adhering to the step-by-step instructions, anyone can learn how to start a fire effectively.
Remember to always prioritize safety, respect fire bans and local regulations, and fully extinguish the fire when finished. With practice and patience, starting a fire will become a reliable and essential tool in your outdoor and emergency preparedness skillset.
FAQ
What’s the best way to store tinder to keep it dry?
Store tinder in a waterproof container like a sealed plastic bag or metal tin. Add silica gel packets to absorb moisture and keep the container in a cool, dry place. For longer trips, consider vacuum sealing portions of tinder to maintain absolute dryness.
How can I start a fire in wet conditions?
Look for dry materials under dense evergreen trees, inside hollow logs, or under bark. Carry petroleum jelly-soaked cotton balls or wax-based fire starters as reliable wet-weather options. Split wet wood to access dry interior portions and create fine shavings from the center.
What are the signs that wood is properly seasoned for use as fuel?
Properly seasoned wood has visible cracks in the end grain, feels lightweight compared to fresh-cut wood, and makes a hollow sound when knocked together. The bark should be loose or falling off, and the wood should have a grayish color rather than fresh-cut appearance.
How do I adjust my fire-building technique for different weather conditions?
In windy conditions, build a taller wind barrier on the upwind side and keep the fire structure lower to the ground. In rainy weather, create a platform of dry materials off the ground and use a tarp shelter above. For snowy conditions, establish a solid base using green logs or rocks to prevent the fire from sinking.
What size should my fire pit be for optimal safety and efficiency?
The fire pit should be at least 2 feet in diameter and 6 inches deep for a basic campfire. For cooking purposes, aim for 3-4 feet in diameter. Always maintain a 10-foot clearance from any flammable materials, including overhanging branches.
How can I minimize smoke production from my campfire?
Use well-seasoned hardwoods, maintain proper airflow through the fire structure, and avoid damp or green wood. Build your fire with a hot initial base to ensure complete combustion. Maintain the fire at a consistent temperature rather than letting it smolder.
What are the most effective fire-starting methods for different elevations?
At higher elevations above 8,000 feet, fires require more oxygen and frequent tending. Build a wider base structure, create multiple air channels beneath your tinder, and expect to use about 20% more tinder than at sea level. At lower elevations, standard fire-building techniques work well but focus on controlling spread in denser air conditions.
How should I modify my fire-building approach during different seasons?
Summer fires need more attention to ground preparation due to dry conditions – dig deeper fire pits and create wider clearance zones. Spring and fall require extra protection from unexpected wind gusts and rain – build stronger wind barriers and keep extra dry tinder protected. Winter fires benefit from a platform of green logs to prevent melting into snow and require approximately 30% more fuel for equivalent heat output.
How can I tell if my campfire isn’t burning right?
Watch for uneven burning patterns, collapsing sides, or flames consistently leaning in one direction. If the base is burning faster than the top, rebuild with a wider foundation. When outer logs burn faster than inner ones, tighten the structure. Black smoke indicates poor oxygen flow – reconstruct with more space between fuel logs.
How can I estimate the amount of firewood needed for different durations?
For a 3-hour evening campfire, gather approximately 15-20 pieces of wrist-thick fuel logs per hour of planned burning. Double this amount for cooking fires. In cold weather, increase your estimates by one-third. Always collect 25% more than your estimate to account for unexpected needs or damp wood.
What techniques help maintain a cooking fire at consistent temperatures?
Create distinct heat zones by building a thicker coal bed on one side. Maintain cooking temperatures by adding similar-sized fuel logs at regular intervals rather than large logs sporadically. For temperature control, adjust coal distribution rather than flame height. Keep a separate stack of thumb-thick hardwood pieces specifically for maintaining cooking temperatures.
How do I properly prepare wood in emergency situations when everything is wet?
Split larger logs into quarters and shave off thin pieces from the interior. Create a “feather stick” by carving multiple thin shavings while leaving them attached to the stick base. Use the flat of your blade to scrape off dry wood powder from split logs. Store these materials close to your body to warm them before attempting ignition.
What are the most reliable natural tinder materials for different environments?
In deciduous forests, look for birch bark, dried maple seeds, and crushed dried oak leaves. Desert environments offer dried yucca fibers and cottonwood fluff. In pine forests, collect pine resin nodules and dry pine needles. Coastal areas provide dried seaweed and fibrous palm materials. Always test local materials before depending on them in crucial situations.
How can I maintain a fire during sleep without compromising safety?
Build a reflector wall using green logs or rocks behind the fire. Create a long-burning base using thick hardwood logs in a parallel configuration. Place two large logs at right angles to your main logs to contain and direct coals. This structure can maintain heat for 4-6 hours with minimal attention while preventing spread.


Leave a Reply