Man and fire. The link between the two is primal, historical and one of the first things that we ever did on this planet that indicated innovation. When our ancestors started a campfire, it was for warmth, light, protection and to prepare their meals.
Today, we still use campfires (or backyard fire pits) for warmth, relaxation, a place to gather and hanging out with our friends, and for cooking our favorite fire-side dishes like marshmallows and hot dogs and even our freshly caught fish and game. Tip: If you plan on cooking over your campfire, then be sure to check out our how to choose the best campfire cooking equipment guide.
However, there are also times you’ll find yourself in an emergency situation where a campfire and a warm sleeping bag will be key to your survival.
So, here are step-by-step how to build campfire instructions for building 8 types of campfires that will help you be prepared for anything…
Table of Contents
- How To Make A Campfire
- Step 1: Prepare Your Fire Bed
- Step 2: Gather Firewood
- Step 3: Types Of Campfires
- Step 4: How To Start A Campfire
- Step 5: Putting Out A Campfire
- FAQs
- What are the essential steps to build a campfire?
- What materials do I need for a campfire?
- What are the different types of campfires I can build?
- How can I make sure my campfire is safe?
- How can I keep my campfire burning?
- Can I cook on a campfire?
- What should I do about building a campfire if it’s windy?
How To Make A Campfire
Here’s the real secret to learning how to build a campfire: feed it the two basic types of fuels that it needs to both thrive and survive:
- Combustible material (things like paper, tinder, pieces of kindling, and larger diameter logs to provide for a longer sustained burn).
- Oxygen. And in order to get plenty of oxygen your fire needs to breathe, which means your wood and your combustible material have to be stacked loosely so air can flow freely through and around the wood (see the building your campfire section below to learn how to build several different types of campfires that facilitate strong airflow and combustion).
So, now you know the secret of the perfect campfire, let’s take a look at how to build a fire step by step.
Step 1: Prepare Your Fire Bed
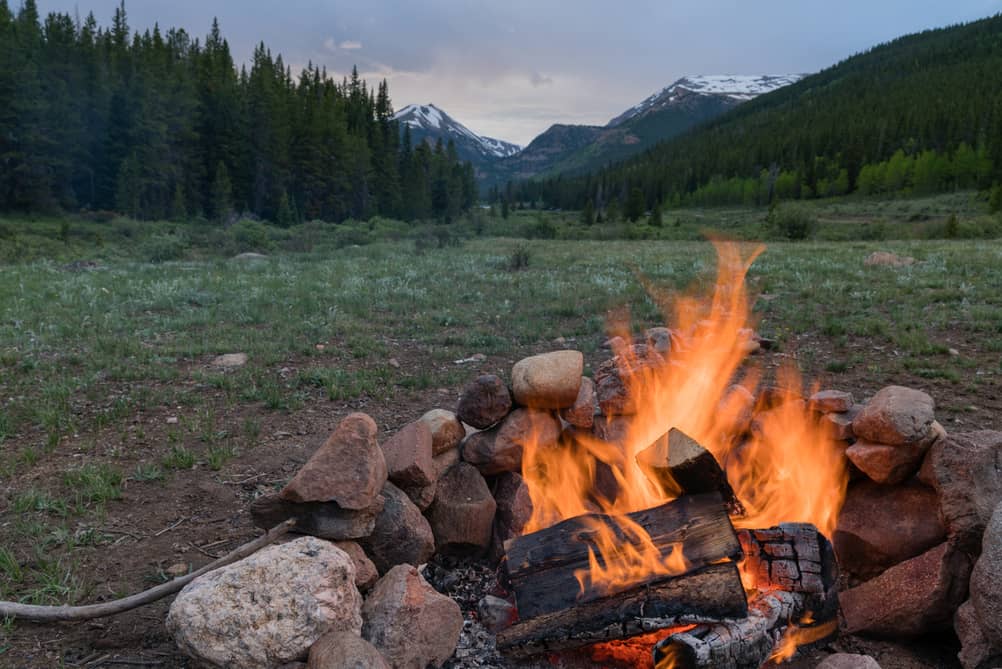
Before you get the matches ready, think about the safety of your surroundings and yourself. You don’t want to be that person: the one who starts the fire in the wrong place and watch it turn from little marshmallow warmer to raging wildfire.
Choosing a campsite with a designated fire area is a smart choice, but if you are handling the fire in a more rugged environment, that means you’re handling it on your own; you need to be as safe as possible. Choose somewhere away from the buses, trees, and other plants that will catch quickly. The whole bed of your fire should always be on earth rather than any grass.
You can make your bare area by digging down and laying it out yourself. Dry grass and bark can catch fire very quickly, so you need to ensure that the ground is completely clear. Once you’ve cleared the area for your campfire, you need to start making your fire bed or fire ring.
Gather the dirt in and ensure that it’s in the center of the area of ground you’ve cleared. Keep forming the dirt together until you have a platform or mound of dirt that stands 3-4 inches high.
You may also want to surround your fire pit with a ring of medium-sized rocks to help define the area and to help prevent the first from spreading outside of the ring.
There, now you have your campfire bed ready to build on.
Step 2: Gather Firewood
There is more to building a campfire than just lighting it. While this is going to help, you also need the fire to continue to burn after you light it. For this, you need to ensure that you have the best firewood for the job, including tinder, kindling, and fuel wood, which are larger-diameter logs.
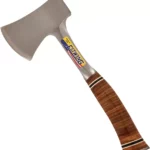
Tip: Make sure you have a reliable hatchet handy when gathering your firewood.
Tinder:
- Dry leaves
- Bark
- Dryer lint
- Wood shavings (fatwood is my favorite)
- Dry grass
- Magnesium shavings
- Cotton Ball Fire Starters
- Wax-infused tinder rope like the Uberleben Tinder Wick.
All of these make for really good on-site tinder, but you can also bring your own, such as dryer lint. It’s always a good idea to bring tinder with you if you’re planning to camp because if it has been raining, the tinder on the ground is going to be wet. Wet tinder doesn’t burn.
If you do have to start a fire with wet wood, then you should probably read our how to start a fire with wet wood first, just to be prepared.
Kindling:
Once you light the fire and get the tinder underneath to create a bigger flame, that’s where the kindling and firewood steps in. This is what will keep the flame going. You can’t move directly to the big log items; otherwise, you’ll put out your blaze before it has a chance to get going. Pieces of kindling can be in the form of smaller twigs and branches. Make sure it’s dry or dead so that it will catch and keep burning.
Our favorite kindling is Fatwood, which is an all-natural waterproof fire starter with an indefinite shelf-life and is highly portable so it’s easy to keep close at hand when you need it.
Firewood:
Once you light the tinder and get your campfire started you’ll need larger diameter logs as well as smaller pieces to keep it going. However, size does matter, so try to collect different size pieces of firewood ranging from an inch or two in diameter up to five or 6 inches in diameter (anything more than six inches in diameter will have to be split with an axe, which means a lot of extra work for you).
Always collect two or three times the amount of fuel wood, kindling, and tinder that you think you’ll need. You’ll be shocked by how fast you would go through these materials, so it’s better to have too much rather than too little.
Step 3: Types Of Campfires
There is more than one way out there to build a campfire, and there are dozens of different types of campfires to choose from, but here are a few of the most commonly used by campers, survivalists, and lovers of the great outdoors.
Quick Tip: Check out our Winter Camping Tips article for more ideas on how to stay warm in the cold.
Pyramid Fire
When you’re camping, it can be helpful to be able to build a fire that you can leave to burn for an hour or so. These are self-sufficient fires that can be safe to leave alone when you’re building a tent or getting the potatoes wrapped and ready to cook! A pyramid fire, also known as a fire pyramid, can be the perfect self-sufficient fire, and here’s how to make one:
- Get five or six logs of different sizes and, starting from larger pieces to the smallest, stack them in a pyramid shape. You do this by putting five of the same size logs opposite to each other in a pyramid, and then place another stack of wood in a perpendicular direction. A pyramid fire needs layers to burn!
- Once you’ve set up the logs, you need tinder! The bit at the top of the logs where they all meet is the perfect place for your tinder to go, so stuff it all in there without knocking over the structure. Top this off with kindling – dry kindling is better.
- Go through the logs and light it up where the tinder is laying. This will start the fire burning, and it should last for over an hour without you needing to add more to it.
Teepee Fire Lay
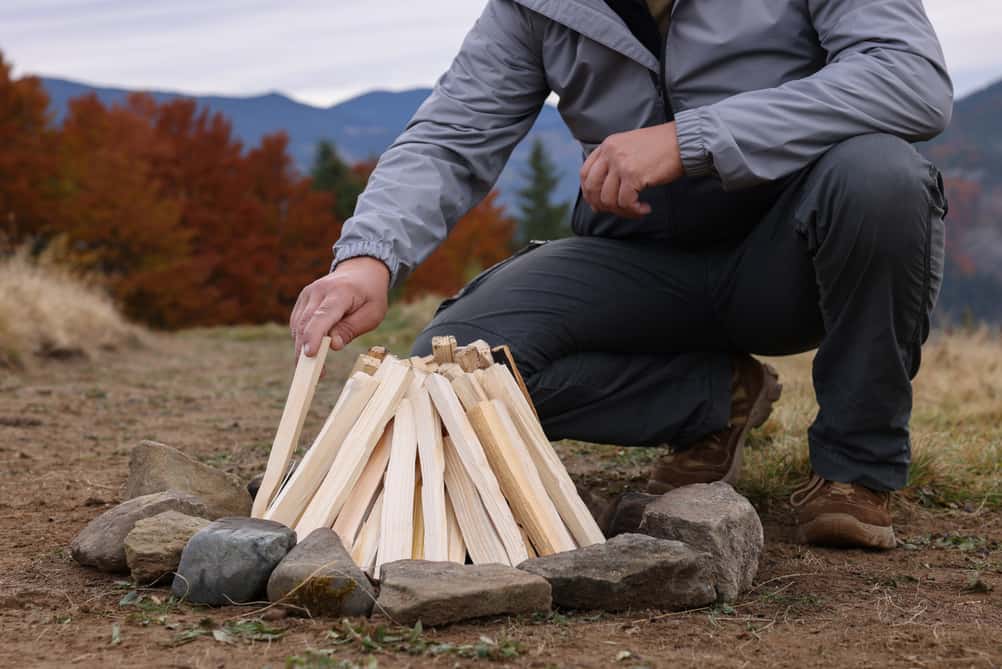
Also known as Tepee Fire, Tipi Fire or Cone fire.
- Put the bundle of tinder that you have gathered into the middle of the site of the campfire.
- Form a teepee shape with your kindling and ensure that you leave an opening for adequate oxidation.
- Add more kindling to the teepee.
- Create a significant structure in a teepee shape with your fuel wood around the kindling teepee.
- Pop a match under the tinder, and this will direct the flame up, rising to the kindling and then onto the fuel wood.
- Eventually, the teepee will collapse in on itself, allowing you to add more logs to the fire as it burns.
Swedish Fire Log
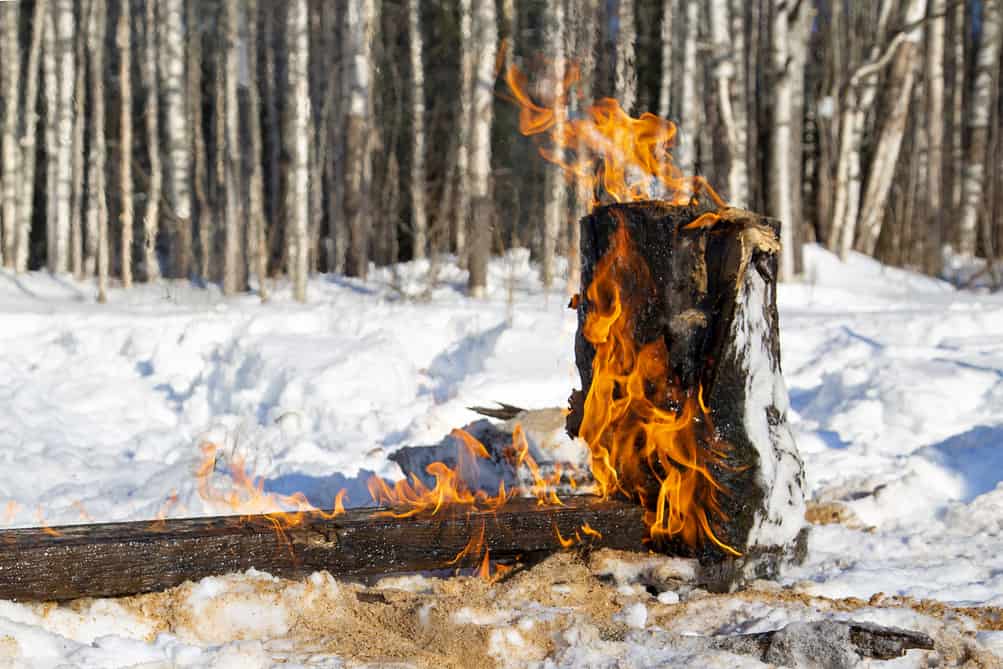
Learning how to build a campfire using the Swedish Fire Log method is impressive, and you may not have even seen it before. A Swedish fire log is a log that has been vertically cut – not entirely – and set on fire. It’s perfect for camping out because the wood burns from the inside out and it can last for up to five hours. It’s been called the Canadian candle, Swedish Log Candle, as well as a Swedish fire log. Here is the best way to do it safely!
You can use a hand saw, but a chainsaw is MUCH faster and easier to use (use the proper safety gear and read the operator’s manual before using any power equipment) .
- Make four cuts vertically into the log in the same way that you would cut a cake. Go slowly, and only cut about 3/4 of the way down the wood. If you don’t have either of those types of saws, you can create a Swedish fire log with a group of thick wooden branches tied together. As long as it can stand up, you can stuff the wooden branches with smaller branches.
- To start your swedish log fire, use kindling and tinder – as mentioned earlier – and pile it on top of the log and the inside of the cuts. Once the tinder begins to burn the embers from the fire will drop down, which ignites the inside of the log. Nifty, hey?
- There’s really no step 3 because you’re done. You can add a cast iron pan to the top of the log and cook on it, make sure the whole thing is stable so that you don’t end up tipping it over!
Log Cabin Fire Lay
This is a very simple and time-honored method for building a campfire that virtually all experienced outdoorsmen know. It might easily be described as a square fire-lay. The Log Cabin is a very versatile method that can be used for cooking, heating, or anything else that fire can do. Perhaps the only downside of this method is the fact that it doesn’t do a good job of conserving wood.
1. You start by taking your two largest logs and laying them down, then using two more sticks on top to make a square. Think of it like building a house.
2. Once you’ve got the first “level” of your “house,” put your most flammable tinder, kindling and small pieces of firewood in the middle of the square. If necessary, take a stick and dig out a small area in the ground so that you can access your tinder. Add some dry twigs and leaves if possible. Now add more pieces of firewood to build the “cabin” up to the desired size.
3. To light, use whatever you have at your disposal to light your dry tinder at the bottom of the “cabin.” As long as your wood is dry, it should catch easily and will burn for some time before more wood is required. One of the best things about this method is that it is quick and easy, and also the easiest fire-lay for beginners to learn.
Platform Fire Lay
While the log cabin fire burns from the bottom up, the platform campfire burns from the top down. This allows it to burn longer and conserve fuel a little better. However, it does require a little more maintenance to keep your fire going.
1. Start by taking your three larger pieces of firewood and cutting them down into smaller pieces (about two feet or so). If you have no way to do this, try sticking them in the forks of a tree and breaking them with your body weight. Lay these three biggest logs down in a row like a platform. Repeat and build a second layer if you want a larger fire.
2. Take your smaller and medium-sized tinder and pile it on top of the platform. As with any fire, make sure to start with your finest and most flammable material and work your way to the larger twigs.
Pro Tip: The sap of certain trees is highly flammable. In particular, look for the sap of evergreen trees, as they make great fire-starting material.
3. If you want maximum heat, let this first platform burn down all the way so that it creates a really nice bed of coals. Now build another platform fire on top of the coals.
Keyhole Fire Pit
This type of campfire and fire pit is named for its resemblance to a keyhole when its shape is viewed from above. It is a specialized method that is designed to be the best fire-lay for cooking.
1. Gather up some good medium-sized rocks (at least the size of your two fists), and lay them out in the shape of a keyhole, with a circular top and a small protrusion at the bottom.
2. Make sure that your main firepit (the larger circle) is dug just a little bit deeper than the notch. Also, make sure you have a tool that can be used to scrape hot coals.
3. Make a fire in the main pit, by whatever means you choose. When a good bed of coals is built, scrape it into the notch (the smaller area) and use that area to cook. This method is the absolute best for cooking with hot coals.
Star Fire Lay
When you’re running low on firewood (or it’s scarce to begin with)… the Star Fire campfire is what you’re looking for because it’s meant to conserve wood to the maximum extent possible. Although this type of fire does require a lot of careful attention to keep it from going out, it really is an efficient method. It is also good for instances in which you have no way to cut a piece of wood easily.
1. Take 8-12 good-sized logs that are between 2 and four feet in length. Lay them out in a radial pattern (like a star or a wheel). Leave a place in the middle where you can dig a small pit and place your most flammable tinder.
2. Add some small twigs and fire kindling in a bundle to the middle pit, so that you can have a good start. It wouldn’t be a bad idea to gather up a bunch of smaller twigs and make yourself a pile. In this way, you can make sure that your fire will not go out.
3. Light your fire in the middle and keep an eye on it. When the large logs become burnt away at the ends, push them inward so that the log can continue burning. You can use your foot to kick the logs into place as you walk around the fire, but be careful not to overdo it, or you can ruin your entire setup.
Lean to Fire Lay
This fire-making method is specifically designed for windy conditions. This makes it ideal for camping in high altitudes. Anyone who has ever camped or lived in a high-altitude location can attest to the frustrations of making a fire in the wind.
1. Take a large log and lay it down in front of you. This is your windbreak, so make sure it faces the wind. Try to use rocks or hills to block the wind from the other side. If nothing is available, you can probably find some rocks with which to build a wall on one side of your fire pit.
2. Dig a small ditch underneath your large log, so that just a little bit of air can get to the fire. On the shielded side of the ditch, place your most flammable tinder.
3. Take some larger sticks and lean them against the large log, covering most of the tinder and kindling to shield it from the wind. As the fire builds, lean more sticks against the main log to create as large a fire as you need and to keep your fire going.
Step 4: How To Start A Campfire
You’ll need a source of fire to ignite your combustibles and start that roaring campfire you’ve been dreaming of.
You can always use a Ferro Rod, lighter or matches to light the tinder, kindling and firewood , but where’s the fun in that.
Why no be adventurous and prepared for an emergency (not to mention how impressed your friends will be) by learning how to use a ferro rod to start a fire, how to make your own waterpoof matches, or at least 8 proven ways to start a a fire without matches.
Step 5: Putting Out A Campfire
Safely putting out the campfire is as important as building a fire that successfully burns. This needs to be done as thoroughly as possible because even the smallest embers could burn down an entire forest area. There’s no need to cause devastation if you can avoid it.
Here are a few tips for putting out a campfire!
- Plan ahead. If you plan to leave a campsite at 5 pm, put the fire out around 3 pm. You want the time to make sure that it’s 100% out!
- Gently pour approximately a third of you water across the entire campfire, as opposed to dumping it all on at once, and slowly stir the wet ashes with a stick to make sure all of the coals are wet. Then, repeat the process two more times to make sure the fire is completely extinguished.
- Feel the heat with the back of your hand to make sure it’s completely cooled down before you leave.
FAQs
What are the essential steps to build a campfire?
The essential steps to build a campfire include preparing your fire bed, gathering firewood, choosing the type of campfire, starting the campfire, and safely putting it out. Each step is crucial to ensure a safe and effective campfire.
What materials do I need for a campfire?
You need combustible materials and oxygen for a campfire. Combustible materials include paper, tinder, kindling, and larger-diameter logs for a sustained burn. Oxygen is necessary for the fire to breathe, and this is achieved by stacking the wood and combustible material loosely to allow air to flow freely.
What are the different types of campfires I can build?
There are several types of campfires you can build, including the Pyramid Fire, Teepee Fire Lay, Swedish Fire Log, Log Cabin Fire Lay, Platform Fire Lay, Keyhole Fire Pit, Star Fire Lay, and the Lean-To Fire Lay. Each type has its unique structure and purpose, such as for cooking, warmth, or survival.
How can I make sure my campfire is safe?
o put out a campfire safely, plan ahead and start extinguishing the fire a couple of hours before you plan to leave. Pour water across the entire campfire and stir the wet ashes to ensure all the coals are wet. Repeat this process a few times and feel the heat with the back of your hand to ensure it’s completely cooled down before you leave.
How can I keep my campfire burning?
To keep your campfire burning, you need to provide it with the right fuel. This includes using larger diameter logs, which burn significantly longer than kindling or small sticks. Always collect two or three times the amount of fuel you think you’ll need. This ensures you have enough fuel to keep the fire going for as long as you need it.
Can I cook on a campfire?
Yes, you can cook on a campfire. Certain types of campfires, like the Keyhole Fire Pit and the Swedish Fire Log, are designed specifically for cooking. You can also use a cast iron pan or other campfire cooking equipment to prepare your meals.
What should I do about building a campfire if it’s windy?
If the weather conditions are windy, you can use the Lean-To Fire Lay method to build your campfire. This method is designed specifically for windy conditions and uses a large log as a windbreak.
Now that you know how to build a campfire and just how fun building a campfire can be…
Here’s another great article to check out Fire Starter Kit – The Ultimate Survival Checklist For Starting A Fire.



Leave a Reply