Ever found yourself craving freshly baked goodies while surrounded by the tranquility of nature? Dutch oven cooking blends rustic charm with delicious results, perfect for foodies who love the great outdoors.
Our guide offers a tantalizing tour through easy-to-follow recipes and expert tips to transform your campfire into a wilderness bakery. Dive in, and let’s get that oven pre-heated!
Table of Contents
Key Takeaways
- Dutch ovens are great for outdoor baking; use a preseasoned, cast iron one.
- Always season your Dutch oven for non-stick cooking and better taste.
- Place coals under and on top of the Dutch oven lid for even heat.
- Start with simple recipes like bread or pizza before trying complex dishes like chicken pot pie.
- Keep safety in mind. Have water or a fire extinguisher ready when cooking over a campfire.
The Art of Dutch Oven Baking
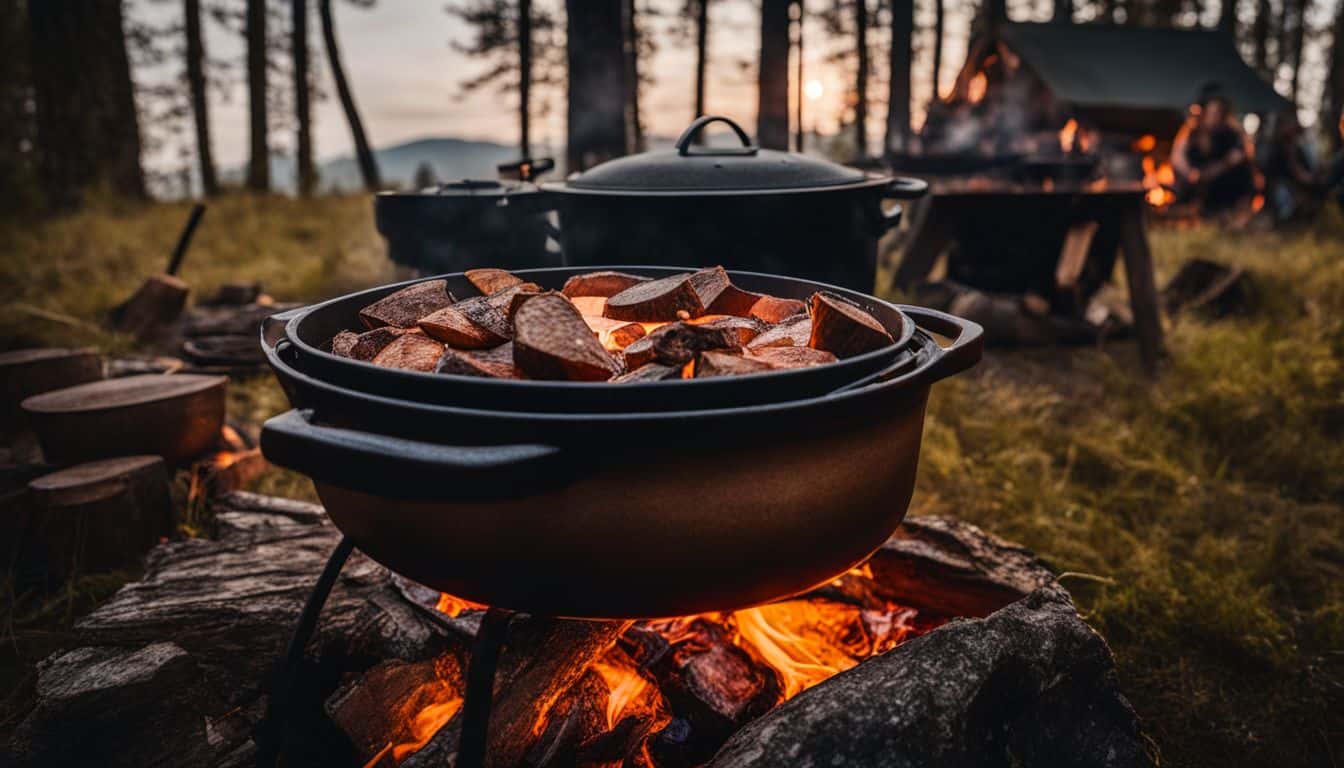
Dutch oven baking transforms simple ingredients into sumptuous meals, all the while wrapped in the warmth of a campfire – it’s an adventure for your taste buds and a return to basics.
Mastering this time-honored craft requires just a few tools, some preparation, and the willingness to embrace the glowing embers as your unconventional oven.
Necessary Tools and Preparations
Preparing to bake with a Dutch oven in the great outdoors starts with gathering the right gear. Your experience will be smooth and enjoyable with these essentials.
- Camp-style Dutch Oven: Look for a sturdy cast iron model. It should have legs on the bottom and a flat lid for holding hot coals.
- Lid Lifter or Tongs: These tools protect your hands from burns when you remove the hot lid.
- Heat-resistant Gloves: Protect your fingers when handling your Dutch oven or other pans near the campfire.
- Charcoal Briquettes: They provide a consistent heat source for outdoor cooking. You can also use wood coals from your campfire.
- Dutch Oven Liners: Parchment liners make cleaning up easier, especially when baking sticky or sugary foods.
- Metal Folding Table (optional): Set up a secure place to put your Dutch oven while it’s hot. If you don’t have one, find a sturdy rock or log.
- Cooking Utensils: Bring wooden spoons, a spatula, and measuring cups for stirring and serving your baked goods.
- Chimney Starter (optional): This tool helps light charcoal briquettes quickly without lighter fluid.
- Cleaning Supplies: Pack a small scrub brush, dish soap, and some towels to clean your oven after use.
Seasoning Your Dutch Oven
Now that you’ve gathered your tools and preparations, it’s time to season your Dutch oven. This process will create a non-stick surface and protect your pot. Here’s how to properly season a cast iron Dutch oven:
- Start with a clean Dutch oven. Wash it with warm, soapy water and dry it thoroughly.
- Preheat your oven to 400 degrees Fahrenheit.
- Apply a thin layer of vegetable oil or shortening all over the Dutch oven, inside and out. Make sure it’s light; too much oil can turn sticky.
- Place aluminum foil on the bottom rack of your oven to catch any drips.
- Put the Dutch oven and lid upside down in the preheated oven.
- Bake for one hour to let the oil set into the cast iron.
- Turn off the heat after an hour and let the Dutch oven cool in the oven.
Dutch Oven Recipes for the Great Outdoors
Embrace the irresistible charm of outdoor cooking with these tantalizing Dutch oven recipes designed to satisfy your adventurous palate. Discover how simple ingredients, a cast iron pot, and an open flame can unlock flavors that make al fresco dining an unforgettable experience.
Sourdough Bread in a Dutch Oven
Baking sourdough bread in a Dutch oven adds an exciting twist to camp cooking. It combines the comfort of homemade bread with the adventure of the great outdoors.
- Get a cast iron Dutch oven ready for baking.
- Make sure your Dutch oven is seasoned well to prevent sticking.
- Follow a sourdough recipe that works best for outdoor conditions.
- Use fresh, quality ingredients for the best flavor.
- Mix your sourdough starter, water, flour, and salt in a bowl.
- Knead the dough until it’s smooth and elastic.
- Let the dough rise until it doubles in size—it may take longer outside.
- Prepare hot coals for even heat while baking.
- Put the dough into the Dutch oven and cover it with a lid.
- Place the oven on top of some coals and spread more on the lid.
- Bake until you hear a hollow sound when tapping on the bread’s crust.
- Take care with cooking safety—use gloves when handling hot cookware.
- Watch a video tutorial before starting if you’re new to this baking style.
Campfire Pizza in a Dutch Oven
Making campfire pizza in a Dutch oven is a surefire way to enjoy a delicious meal outdoors. You’ll love how the cast iron creates a crispy crust, just like your favorite pizzeria!
- Gather all necessary tools: You’ll need a Dutch oven, coals or campfire embers, and a lid lifter.
- Get your ingredients together: Prepare pizza dough, sauce, cheese, and toppings of your choice.
- Heat the Dutch oven over some hot coals for about 10 minutes.
- Roll out your pizza dough on a flat surface until it’s the desired thickness.
- Carefully place the dough into the heated Dutch oven. Let it cook for about 2 minutes to firm up the bottom.
- Add sauce, spreading it evenly over the crust with a spoon, but leave some space at the edges.
- Sprinkle cheese generously on top of the sauce.
- Layer your favorite toppings on the cheese. This could be pepperoni, veggies, or anything you like!
- Put the lid on your Dutch oven and pile hot coals on top to mimic an oven’s baking environment.
- Cook for about 10 to 15 minutes. Check occasionally by lifting the lid with your lifter – take care not to let ashes fall in!
- When the edges are golden, and the cheese is bubbling, carefully remove it from the coals using heat-proof gloves or mitts.
- Let it sit for a few minutes; this rest time allows easier slicing and prevents burns from too-hot toppings.
- Slice up your campfire pizza and serve it right away. Enjoy each bite with gooey cheese and perfect crusts!
Dutch Oven Chicken Pot Pie
Cooking a Dutch Oven Chicken Pot Pie outdoors can be an exciting adventure. Let’s get started with this easy-to-follow recipe that brings the comfort of home cooking to the great outdoors.
- Begin by gathering all your ingredients: chunks of chicken, sliced carrots, peas, diced potatoes, chopped onions, and ready-made pie crusts.
- Make sure your Dutch oven is clean and well-seasoned for non-stick cooking and better flavor.
- Brown the chicken pieces in the Dutch oven over your campfire until they’re golden on all sides.
- Add in the onions and cook them with the chicken until they become soft.
- Pour in chicken broth, then stir in the carrots and potatoes until everything is mixed well.
- Sprinkle flour over the mixture to help thicken the sauce as it cooks.
- Season with salt, pepper, thyme, or any other herbs you love for extra taste.
- Simmer these ingredients together until the veggies are tender — about 10 minutes should do it.
- Take one of your pie crusts and lay it out flat on a clean surface. Cut it to fit inside your Dutch oven as a bottom crust layer.
- Carefully place this crust at the bottom of your Dutch oven over the simmering filling.
- Add in frozen peas to bring a pop of color and freshness into your pot pie mix.
- Cover everything with a second pie crust. Pinch around the edges to seal it nicely against the Dutch oven sides.
- Cut slits into the top crust so steam can escape while baking. This keeps your pastry from getting soggy!
10-Minute Dutch Oven S’more Cake Recipe
Moving on from savory dishes, let’s dive into a sweet treat perfect for outdoor adventures – the 10-Minute Dutch Oven S’more Cake Recipe. This dessert brings campfire joy right to your table in no time.
- Gather your ingredients: You’ll need chocolate cake mix, graham crackers, marshmallows, and chocolate bars.
- Prepare the Dutch oven by greasing it lightly with butter or oil. Make sure it’s coated well to prevent sticking.
- Crush the graham crackers into small pieces. You can put them in a bag and use a rolling pin.
- Pour half of the chocolate cake mix into the Dutch oven. Spread it out evenly.
- Layer the crushed graham crackers over the cake mix. Press down slightly with your hands.
- Break up chocolate bars into chunks. Sprinkle these pieces on top of the graham cracker layer.
- Add marshmallows next, covering the chocolate layer completely. The more, the merrier!
- Pour the remaining cake mix over everything. Shake gently to settle the mix in between gaps.
- If you’re cooking over a campfire, place the Dutch oven on hot coals but not directly in flames.
- With a grill, set it to medium heat and place the Dutch on top.
- Check after about 10 minutes to see if the marshmallows have melted and formed a golden top.
- If not done yet, give it some more time, but watch closely to avoid burning.
- Once cooked through, carefully remove the Dutch oven from heat; remember, it’s very hot!
- Let cool for a few minutes, as it will be extremely steamy inside.
- Spoon out servings while still warm for gooey goodness.
- Dig in and enjoy that classic s’mores flavor with an ooey – gooey twist!
Dutch Oven Herbed Potatoes
Dutch oven herbed potatoes bring comfort and flavor to any outdoor meal. They are easy to make with your trusty cast iron Dutch oven.
- First, gather all your ingredients: potatoes, olive oil, garlic, and a mix of herbs like rosemary and thyme.
- Wash and cut the potatoes into even chunks so they cook evenly in the Dutch oven.
- In a bowl, mix your cut potatoes with a generous drizzle of olive oil. This will help them get crispy.
- Add minced garlic and the herbs to the bowl. Fresh or dried herbs both work well.
- Stir everything until the potatoes are well coated with oil, garlic, and herbs.
- Next, place your seasoned Dutch oven over the campfire or on your stove. Let it get hot for a few minutes.
- Carefully add your herbed potatoes to the hot Dutch oven. Listen for that sizzle!
- Cover with the lid and let them cook. Stir occasionally for even browning.
Dutch Oven Peach Cobbler
Dutch ovens are perfect for making peach cobbler outdoors. You can use them on stoves, grills, or directly over a campfire.
- Get Your Ingredients Together:
- Fresh peaches for the filling
- Sugar, flour, and spices
- Dough for the crust
- Prep Your Dutch Oven:
- Make sure it’s well seasoned
- Avoid food sticking and rust
- Create the Filling:
- Slice peaches and mix with sugar and spices
- Let them sit to bring out the juices
- Make the Crust:
- Combine flour, butter, and water
- Roll the dough to fit your Dutch oven
- Layer It In:
- Put peach mixture at the bottom
- Top with your rolled – out crust
- Place some coals on top of the oven too
- Check for Doneness:
- Golden brown crust is your clue
- Filling should be bubbling around edges
- Let It Rest:
- Give it a few minutes after removing from heat
- Helps thicken up before serving
Tips for Successful Dutch Oven Cooking
Keep your Dutch oven balanced for even cooking. Place it on a flat surface if you’re using coals or a campfire. Check that the legs are stable so your food cooks properly, not just on one side.
Control the heat by adding or removing coals. More coals mean higher temperatures; fewer will lower the heat.
Preheat your cast iron before you start cooking to avoid sticking. Oil the oven lightly with high-heat tolerant oils like vegetable or canola oil. This creates a non-stick layer and adds flavor to your dishes like cornbread, pies, or buttermilk biscuits.
Keep the lid secure while cooking to trap in heat and moisture for tender and juicy meals every time.
Conclusion
Dutch oven baking brings warmth to any outdoor adventure. It turns simple ingredients into mouthwatering meals right by your campfire. Imagine the smell of fresh bread or peach cobbler while you’re under the stars! With a seasoned Dutch oven and some practice, you can become a master at campsite cooking.
Try these recipes con your next trip – they might just become your go-to favorites in the great outdoors!
Check out our articles on seasonal campfire cooking recipes and camping etiquette.




![Dutch Oven Breads [Paperback] Mark Hansen [Paperback] Mark Hansen [Paperback] Mark Hansen [Paperback] Mark Hansen [Paperback] Mark Hansen [Paperback] Mark Hansen [Paperback] Mark Hansen [Paperback] Mark Hansen [Paperback] Mark Hansen [Paperback] Mark Hansen [Paperback] Mark Hansen [Paperback] Mark Hansen](https://m.media-amazon.com/images/I/51bAAzZYTwL._SL160_.jpg)



Leave a Reply